How to Tighten Loose E-Bike Fenders: A Step-by-Step Guide
There is nothing quite as frustrating as the “clack-clack-clack” of a rattling fender during an otherwise peaceful morning commute. If you’ve noticed your electric bike making more noise than usual, or if you’ve seen your fenders wobbling over every pothole, you aren’t alone. Knowing how to tighten loose e-bike fenders is one of the most essential skills for any e-bike owner.
Because e-bikes travel at higher average speeds and weigh more than traditional bicycles, they are subjected to significantly more vibration. These vibrations act like a slow-motion jackhammer on your bike’s hardware, eventually loosening the bolts that keep your fenders in place. Ignoring a loose fender isn’t just an annoyance—it can lead to tire damage, sudden wheel lock-ups, or expensive repairs.
In this comprehensive guide, we will walk you through everything from identifying the source of the rattle to professional-grade tightening techniques that will keep your ride silent for miles to come.
Why Do E-Bike Fenders Become Loose?
Before we grab the tools, it’s important to understand the “why.” E-bikes are high-performance machines. Unlike a standard cruiser, an e-bike often hits speeds of 20–28 mph regularly.
1. Constant Road Vibrations
Every crack in the pavement sends a shockwave through the frame. Since fenders are often attached at the end of long, thin metal “stays,” they act like tuning forks, amplifying those vibrations until the bolts begin to back out of their threads.
2. Rough Terrain and Off-Roading
If you ride an e-MTB or a fat-tire commuter, you likely tackle curbs, gravel, and uneven paths. These high-impact movements put lateral stress on the fender mounting points, which can bend the hardware or strip the mounting eyelets.
3. High Torque and Motor Resonance
The mid-drive or hub motor on your e-bike produces torque that can cause micro-vibrations throughout the chassis. This resonance is unique to electric bikes and is a leading cause of loose electric bike fenders.
4. Improper Initial Installation
Many e-bikes are shipped in boxes and assembled by the owner or a shop in a hurry. If the fender bolts weren’t treated with a thread-locking compound or weren’t torqued to the correct spec, they are guaranteed to loosen within the first 100 miles.
5. Corrosion and Rust
For year-round commuters, salt and rain can corrode the bolts. As rust forms, it can eat away at the threads, causing the bolt to lose its “grip” within the frame bossing.
Signs Your E-Bike Fenders Need Tightening
Don’t wait for the fender to fall off mid-ride. Watch and listen for these early warning signs:
- Rattling or Metallic Tinkling: A high-pitched “pinging” sound usually indicates a loose stay bolt.
- Fender Wobbling: If you look down and see the front or rear fender swaying side-to-side, the mounting bridge is likely loose.
- Tire Rubbing: A “schlick-schlick” sound that changes frequency with your speed means the fender has shifted and is contacting the tire tread.
- Visible Gaps: If you see a gap between the bolt head and the fender stay, it’s time for an immediate e-bike fender repair.
- Bent Fender Stays: If the metal rods holding the fender look asymmetrical, they may have been knocked out of alignment, putting tension on the bolts.
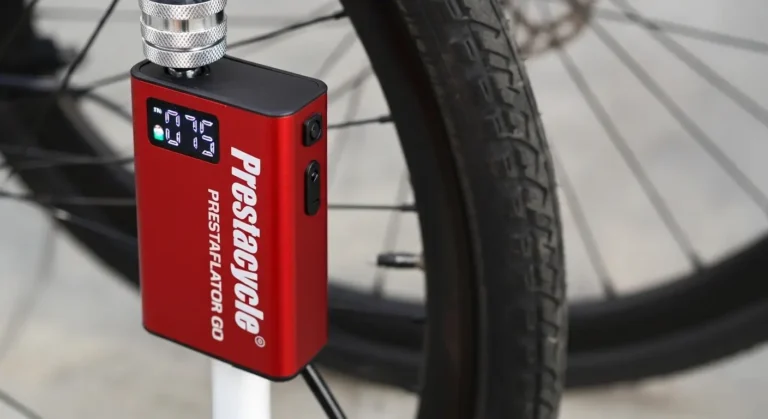
Tools You’ll Need
Having the right tools makes the difference between a 5-minute fix and a stripped bolt head. Here is what I recommend keeping in your DIY maintenance kit.
| Tool | Purpose | Essential or Optional |
|---|---|---|
| Allen Key Set (Metric) | To turn the 3mm, 4mm, and 5mm hex bolts found on most e-bikes. | Essential |
| Bicycle Multi-tool | For quick adjustments while out on the road. | Essential |
| Small Torque Wrench | To ensure bolts are tightened to the exact Newton-meter (Nm) spec. | Optional (Highly Recommended) |
| Blue Threadlocker | Prevents bolts from vibrating loose again. | Optional (Mechanic’s Secret) |
| Phillips Head Screwdriver | Some budget fenders use cross-head screws instead of hex bolts. | Essential |
| Cleaning Cloth/Degreaser | To clean the mounting points before tightening. | Essential |
| Adjustable Wrench | To hold the nut on the back of the fender bridge (if applicable). | Optional |
Safety Precautions Before Starting
Working on an e-bike requires a slightly different approach than a standard bike due to the electrical components and the weight of the machine.
- Power Down: Always turn off the display and motor system before performing maintenance.
- Remove the Battery: E-bikes are heavy. If you are lifting the bike or putting it in a stand, removing the battery reduces the weight by 7–10 lbs and prevents accidental motor engagement.
- Stable Surface: Use a dedicated bike repair stand if possible. If not, ensure the bike is on a flat surface and the kickstand is secure.
- Watch Your Fingers: Be careful when working around disc brake rotors; they can be sharp and may contain residual heat if you just finished a ride.
How to Tighten Loose E-Bike Fenders (Step-by-Step)
Follow these steps to perform a professional-grade bicycle fender adjustment.
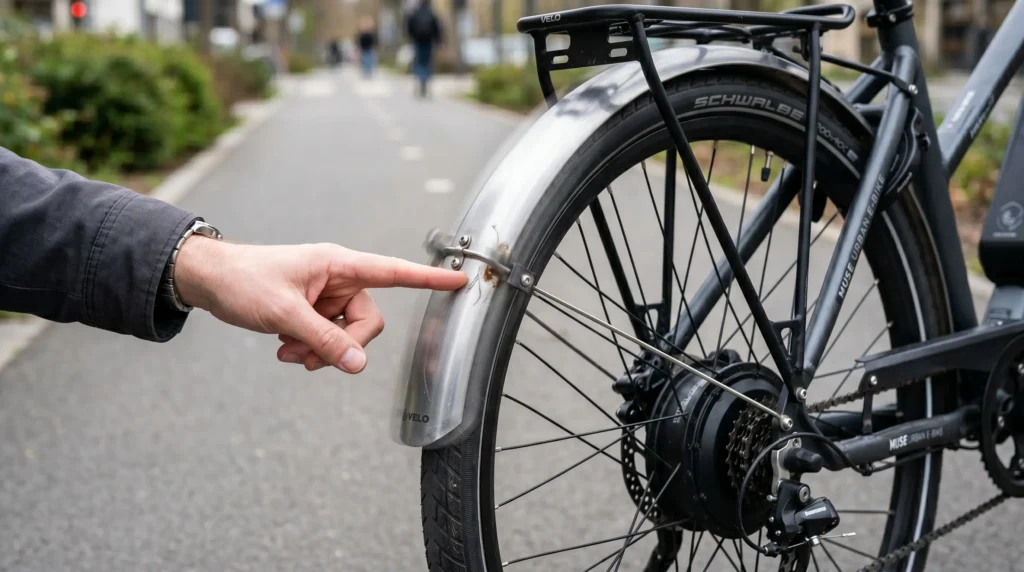
Step 1: Inspect the Fender Mounting Points
Start by visually inspecting all connection points. Most full-coverage e-bike fenders have three to four main points:
- The crown of the fork (front).
- The dropouts near the axle (front and rear).
- The seatstay bridge (rear).
- The chainstay bridge near the bottom bracket (rear).
Gently wiggle the fender with your hand to see which specific bolt is moving.
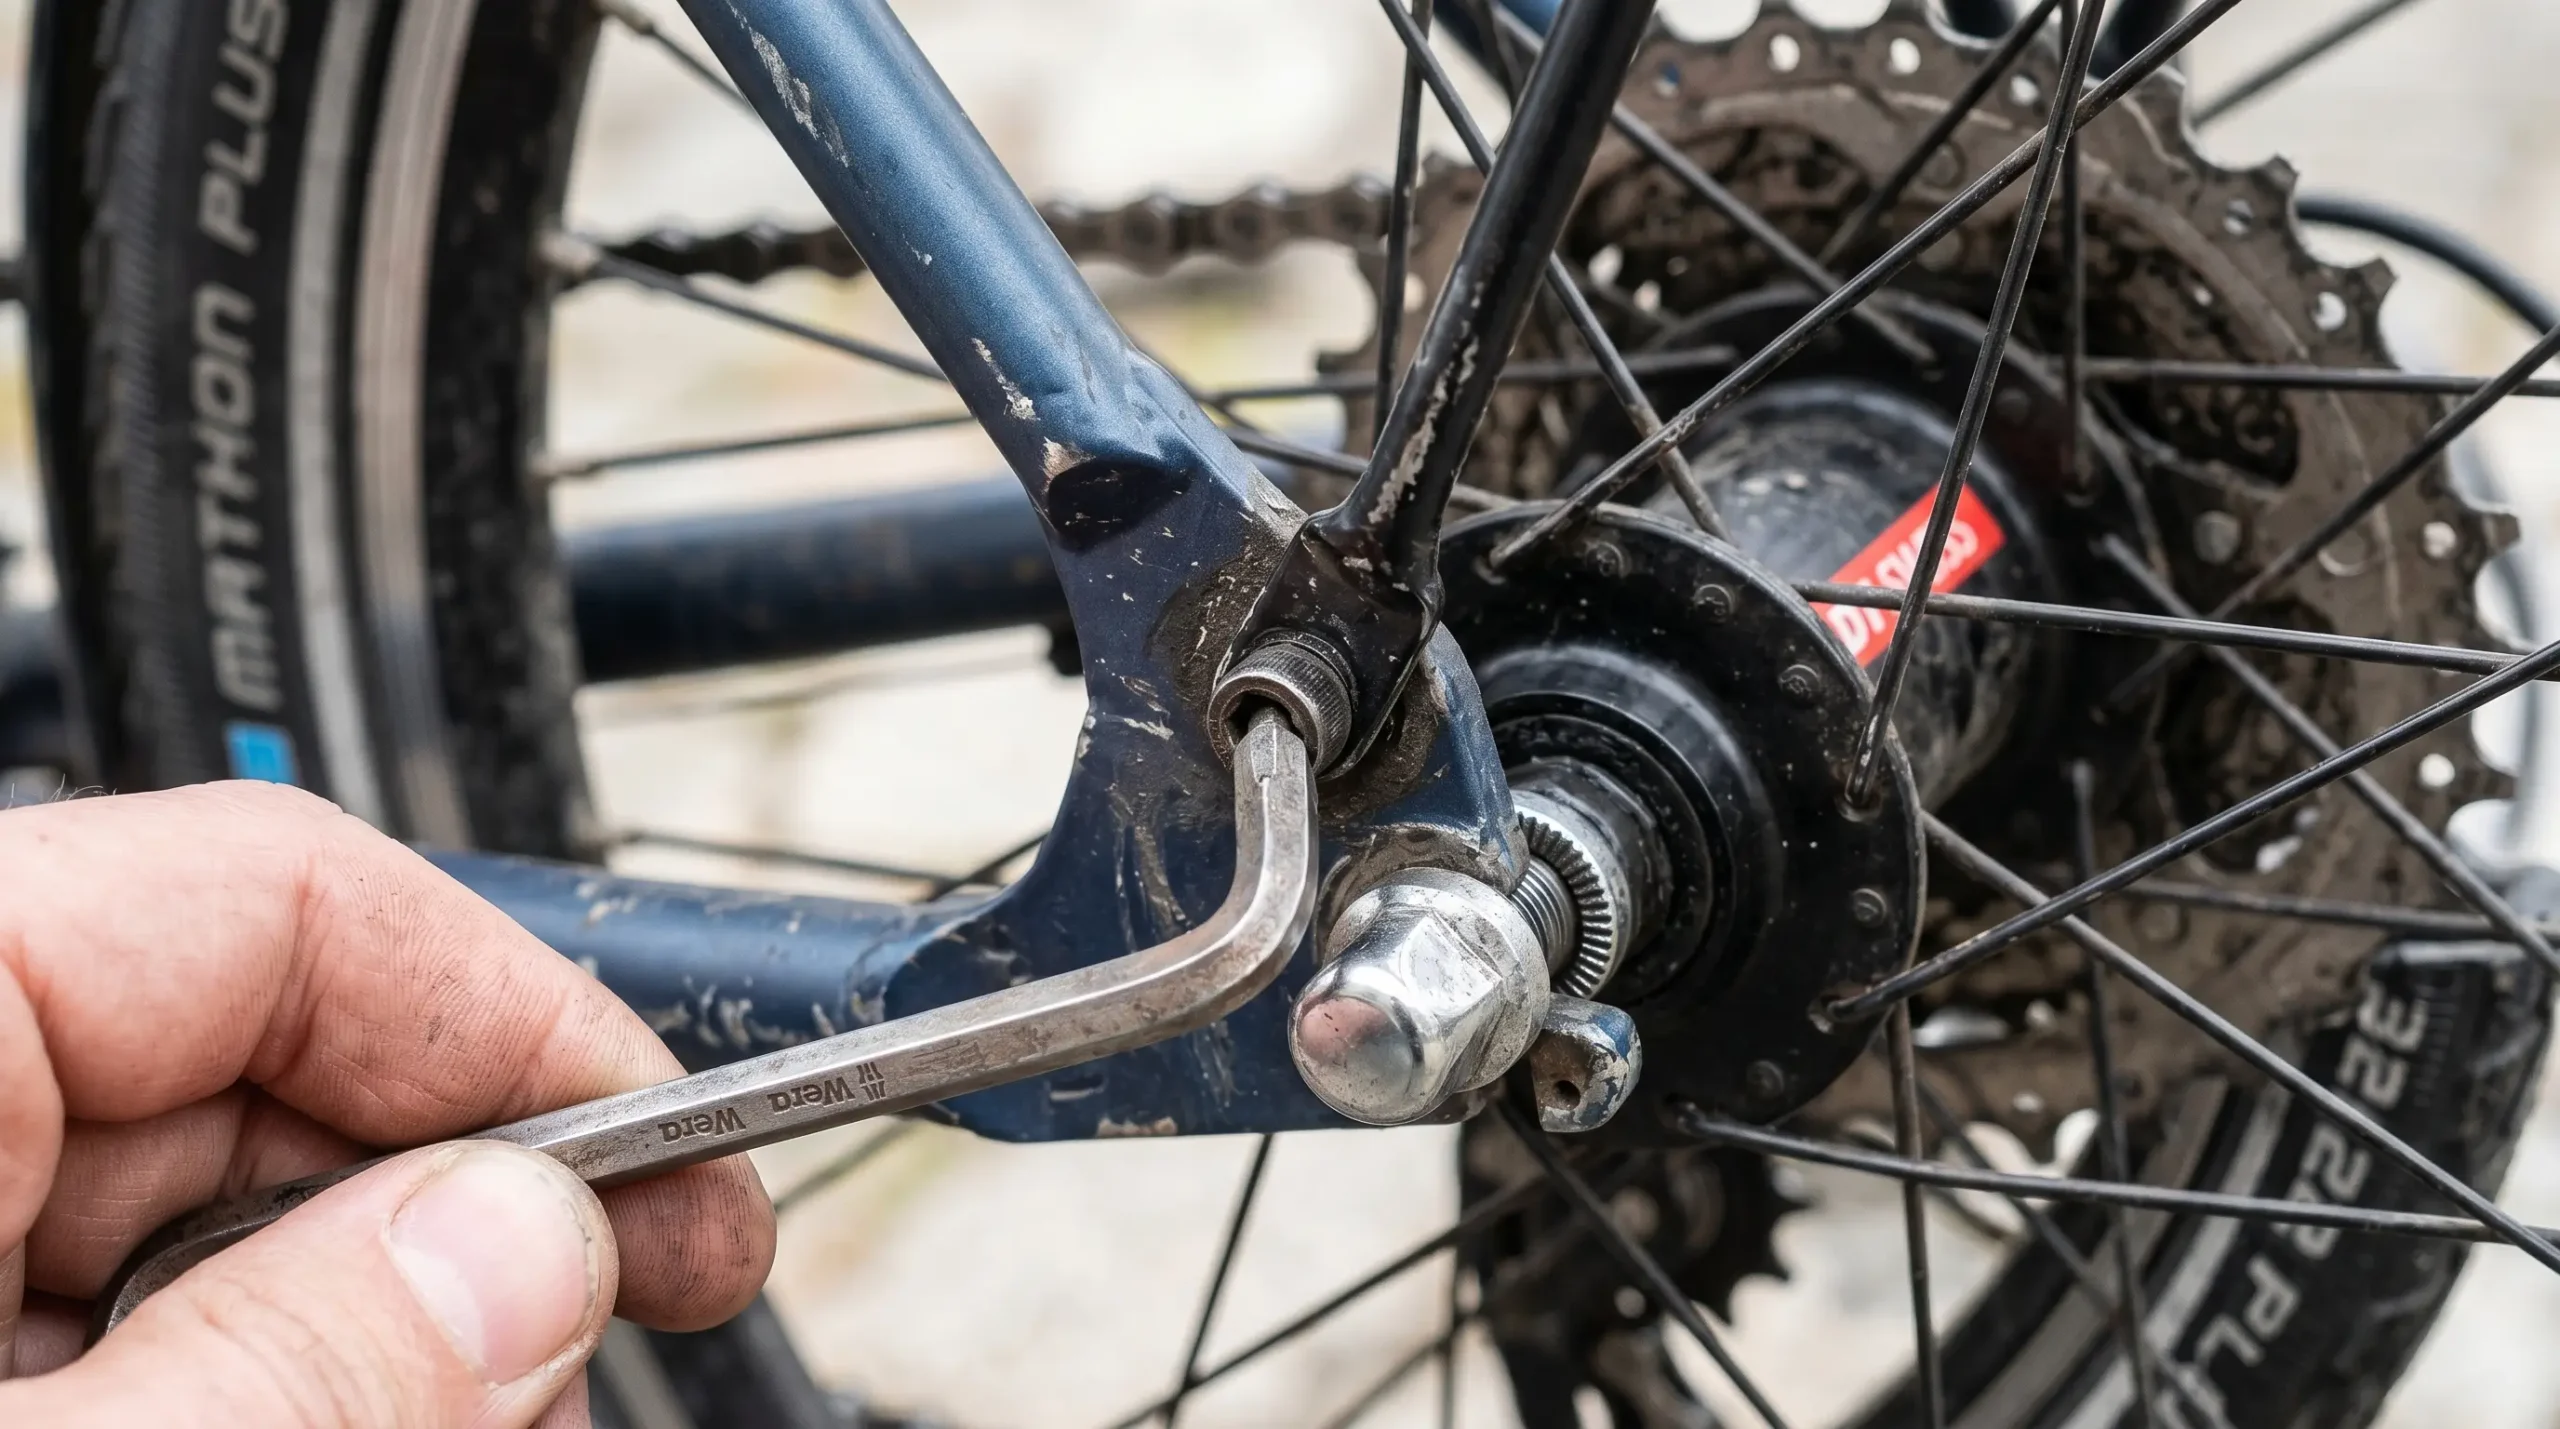
Step 2: Check and Tighten Fender Stay Bolts
The “stays” are the thin metal rods that support the fender. These are usually held in place by small 3mm or 4mm Allen bolts near the wheel axles.
- Fit your Allen key snugly into the bolt head.
- Turn clockwise to tighten.
- Mechanic’s Tip: If the bolt feels “crunchy,” back it out entirely, wipe the threads clean, and re-insert it.
Step 3: Tighten Frame and Fork Attachments
The most common source of loud rattling is the main mounting bolt at the fork crown or the rear bridge.
- Use your 5mm Allen key to check the tightness.
- If the fender uses a nut and bolt system (common on the fork), you will need a wrench to hold the nut on the backside while you tighten the bolt from the front.
Step 4: Realign the Fender
Before you do the final “hard” tighten, ensure the fender is centered over the tire.
- Stand behind the bike and look through the fender.
- The gap between the tire and the fender should be uniform on both sides.
- If it’s tilted, loosen the stay bolts slightly, adjust the position, and hold it in place while re-tightening.
Step 5: Check Tire Clearance
E-bike tires expand slightly when you ride due to heat and centrifugal force. You want at least 10mm of clearance between the tire and the fender. If the fender is too close, it can trap a small pebble and jam the wheel.
Step 6: Apply Thread Locker (Optional but Recommended)
If you find that your fenders come loose every few weeks, use Blue Threadlocker (e.g., Loctite 242).
- Remove the bolt.
- Apply one small drop to the threads.
- Re-install and tighten.
- This “plasticizes” the connection, making it resistant to vibration while still allowing you to remove it later with hand tools.
Step 7: Test Ride the E-Bike
The “bounce test” is your final check. Pick the bike up about two inches off the ground and drop it onto its tires. If you hear any metal-on-metal noise, something is still loose. Finally, take a short ride on a bumpy surface to confirm the silence.
Common Mistakes to Avoid
As a mechanic, I see these four mistakes most often:
- Overtightening Bolts: Most fender bolts are small (M5 or M4). If you crank down too hard, you will strip the aluminum threads in your expensive e-bike frame. Tighten until “snug,” then a quarter-turn more.
- Ignoring Damaged Hardware: If a bolt is rusted or the hex head is rounded out, don’t put it back in. Replace it with a stainless steel bolt from a local hardware store.
- Misalignment: A tight fender that is crooked will eventually rub through the sidewall of your tire, leading to a blowout.
- Skipping the Rear Fender: We often notice the front fender because it’s right in front of us, but the rear fender carries more vibration from the motor. Always check both.
When to Replace Your Fender Hardware
Sometimes, tightening bicycle fender stays isn’t enough. You should replace your hardware if you notice:
- Stripped Threads: The bolt spins and spins without getting tight.
- Cracked Plastic: If the fender itself is cracked at the mounting hole, a washer might provide a temporary fix, but the fender needs replacement.
- Bent Stays: If the stays are severely bent, they lose their structural integrity and will continue to cause rubbing.
How to Prevent E-Bike Fenders from Loosening Again
Prevention is the best e-bike maintenance tip I can give.
- Monthly Inspections: Make it a habit to wiggle your fenders every time you lube your chain.
- Use Rubber Washers: Placing a small rubber washer between the fender and the frame can act as a shock absorber, reducing the vibration that reaches the bolt.
- Proper Torque Settings: Most fender bolts require only 3–5 Nm of torque. Using a torque wrench ensures you are in the “Goldilocks” zone-not too loose, not too tight.
- Keep it Clean: Mud buildup inside the fender adds weight. The heavier the fender, the more it will shake and loosen the hardware.
Recommended Tools for E-Bike Fender Repairs
To do the job right, I recommend the following items. These are staples in my professional workshop.
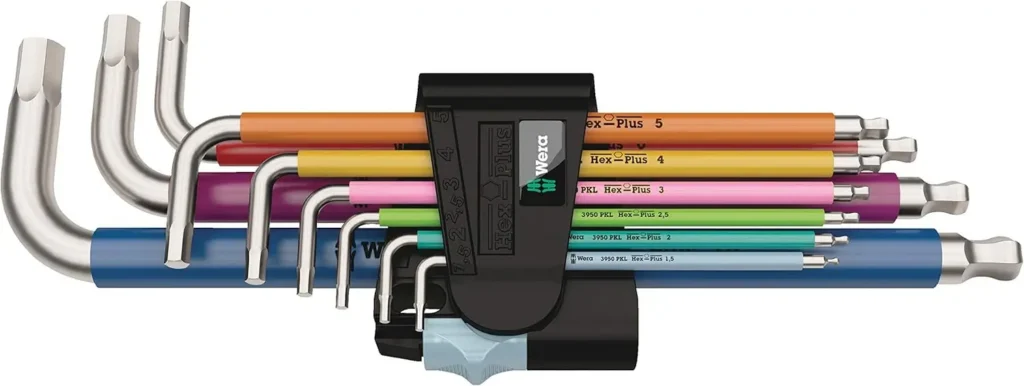
1. Wera Hex-Plus Allen Key Set
- Why it’s useful: These keys have a patented design that prevents stripping the bolt heads.
- Key Features: Multi-color coding, high-quality steel.
- Pros: Lifetime warranty; excellent grip.
- Cons: Expensive for beginners.
- Best for: The DIYer who wants the last set of hex keys they’ll ever buy.
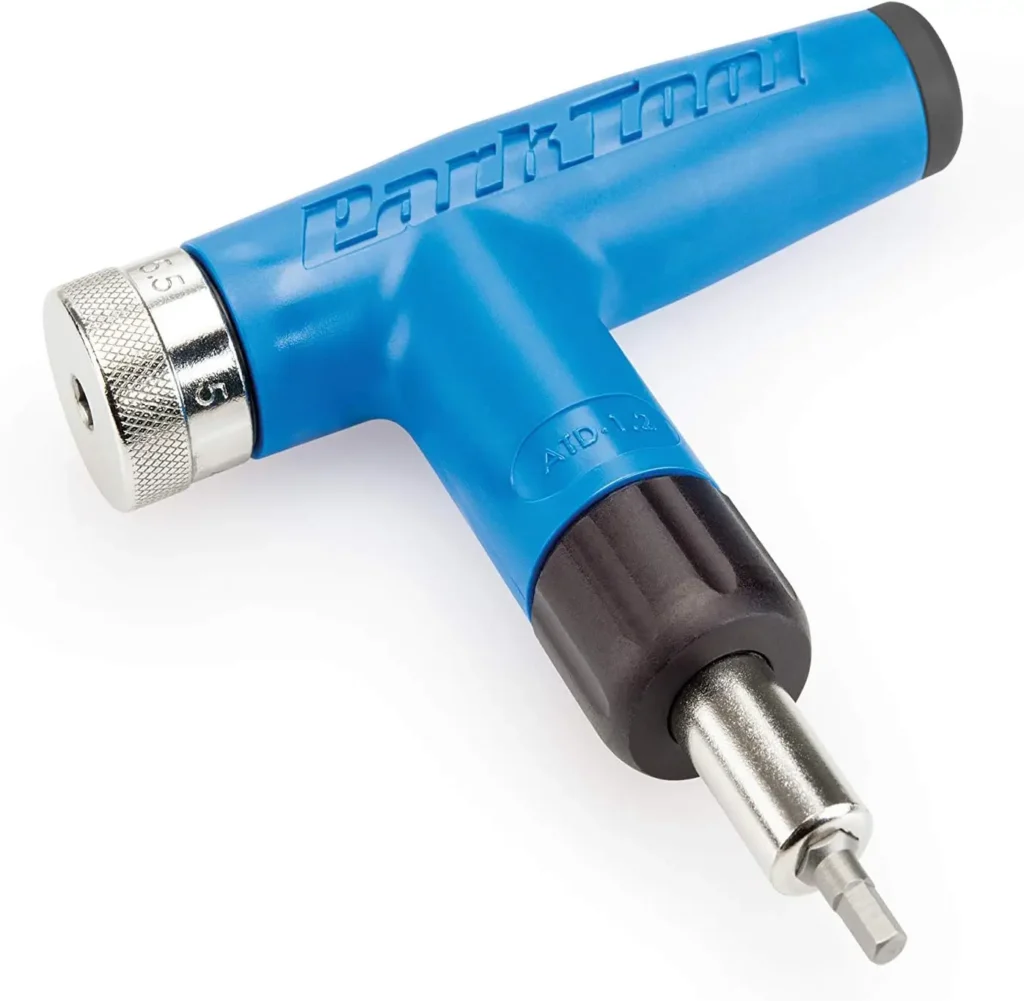
2. Park Tool ATD-1.2 Adjustable Torque Driver
- Why it’s useful: It prevents you from stripping the threads on your e-bike frame.
- Key Features: Adjustable from 4 to 6 Nm.
- Pros: Handheld; incredibly accurate.
- Cons: Limited range (not for heavy bolts).
- Best for: Precision fender and cockpit adjustments.
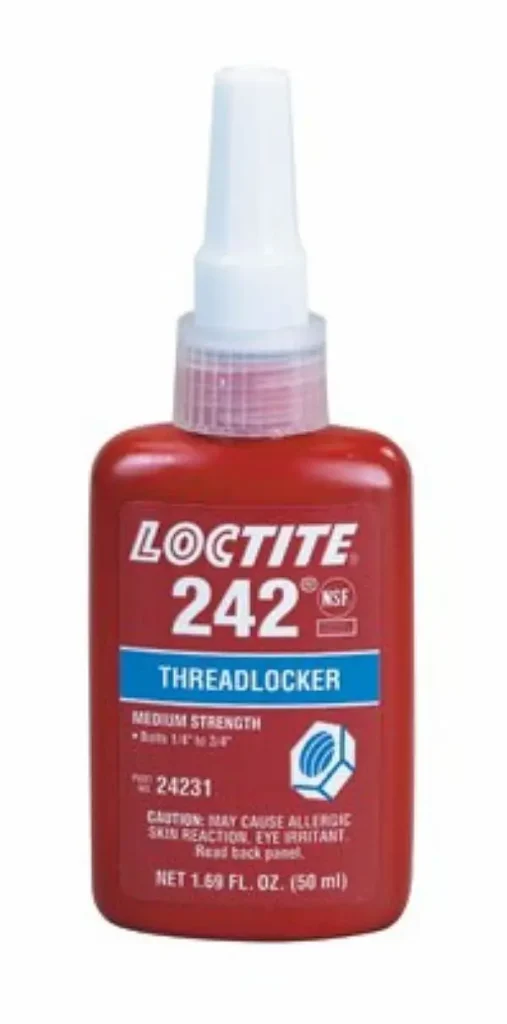
3. Loctite 242 (Blue) Threadlocker
- Why it’s useful: It’s the “glue” that keeps bolts from vibrating out.
- Key Features: Medium strength; removable with hand tools.
- Pros: Cheap; highly effective for e-bikes.
- Cons: Messy if you use too much.
- Best for: Every bolt on your e-bike.
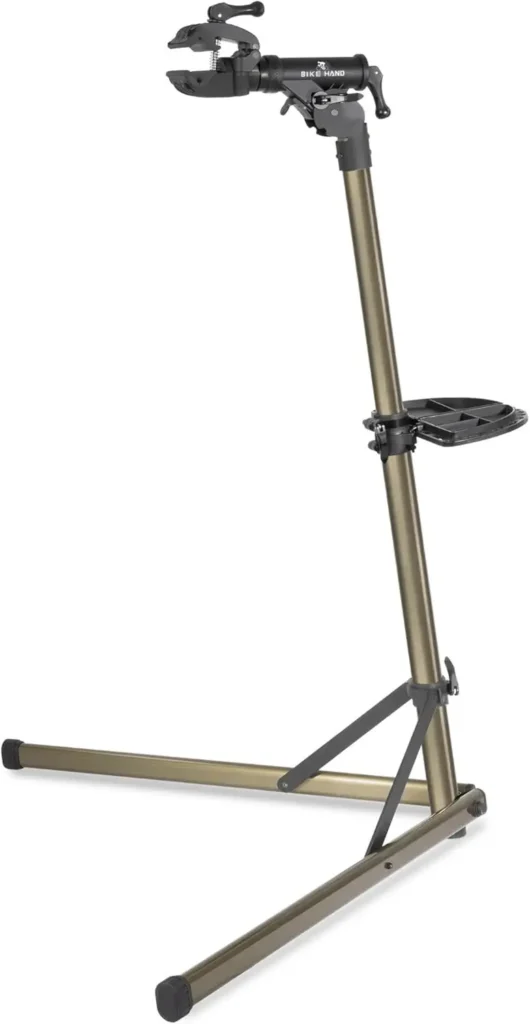
4. Bike Hand E-Bike Repair Stand
- Why it’s useful: Lifts the heavy bike so you can see the fender mounting points at eye level.
- Key Features: Heavy-duty clamp; holds up to 100 lbs.
- Pros: Stable; makes cleaning and repair easy.
- Cons: Takes up floor space.
- Best for: Home mechanics with heavy e-bikes.
Product Comparison: Best Fender Mounting Hardware
| Hardware Type | Vibration Resistance | Durability | Ease of Install | Recommendation |
|---|---|---|---|---|
| Standard Steel Bolts | Low | Medium | High | Replace with Stainless |
| Stainless Steel w/ Loctite | High | High | Medium | Best for Commuters |
| Nylon-Insert Lock Nuts | Very High | High | Low | Best for Off-Road E-Bikes |
| Clip-on Fenders | Low | Low | Very High | Only for temporary use |
Frequently Asked Questions
Why does my e-bike fender keep rattling even after I tighten it?
Check the fender stays. If they are touching the frame or the fender itself is hitting a brake cable, it will rattle regardless of how tight the bolts are. You may also have a loose “bridge” inside the fender.
Can I ride with a loose fender?
It is not recommended. A loose fender can rotate into the wheel, causing an immediate stop that could lead to a crash.
How tight should fender bolts be?
Generally, 3 to 5 Newton-meters (Nm). If you don’t have a torque wrench, “firmly snug” is the goal.
Do I need a torque wrench for fenders?
It’s not strictly necessary, but because many e-bikes have aluminum or carbon frames, it is very easy to ruin the frame by overtightening a small bolt.
Why is my fender rubbing against the tire?
This is usually caused by a bent stay or a shifted mounting bracket. Loosen the stay bolts, realign the fender so it’s centered, and retighten.
Can I use Zip-ties to fix a loose fender?
In an emergency, yes. However, zip-ties degrade in UV light and will eventually snap. Use them only to get home.
Should I use grease on fender bolts?
No. Use threadlocker. Grease helps bolts stay loose, which is the opposite of what you want for a fender.
What size Allen key do I need?
Most e-bike fenders use 3mm, 4mm, or 5mm hex bolts.
My fender is plastic; can I still tighten it?
Yes, but be careful. Plastic can crack if the bolt head is too small. Use a flat washer to spread the pressure.
10. When should I replace a fender rather than fixing it?
If the metal stays are snapped or the mounting holes in the plastic are completely “ovaled” out, it’s time for a new fender.
Conclusion
Mastering how to tighten loose e-bike fenders is a rite of passage for every electric bike owner. Because of the unique vibrations and higher speeds of e-bikes, fender maintenance is a recurring task rather than a one-time fix.
By performing regular inspections, using the right tools (like a 4mm Allen key and some blue threadlocker), and ensuring proper tire clearance, you can eliminate annoying rattles and ensure your commute remains safe. Remember: a silent bike is a happy bike. Keep that hardware snug, and enjoy the whisper-quiet performance of your e-bike!
Amazon Affiliate Disclosure
As an Amazon Associate, I earn from qualifying purchases. This means if you click on a link to a recommended tool and make a purchase, I may receive a small commission at no extra cost to you.
Featured Snippet Answer:
To tighten loose e-bike fenders, first identify the loose mounting points at the fork, frame, or stays. Use a 3mm, 4mm, or 5mm Allen key to tighten the bolts clockwise. For a permanent fix, apply a drop of blue thread-locking compound to the threads and ensure there is at least 10mm of clearance between the fender and the tire